How To Travel Photography
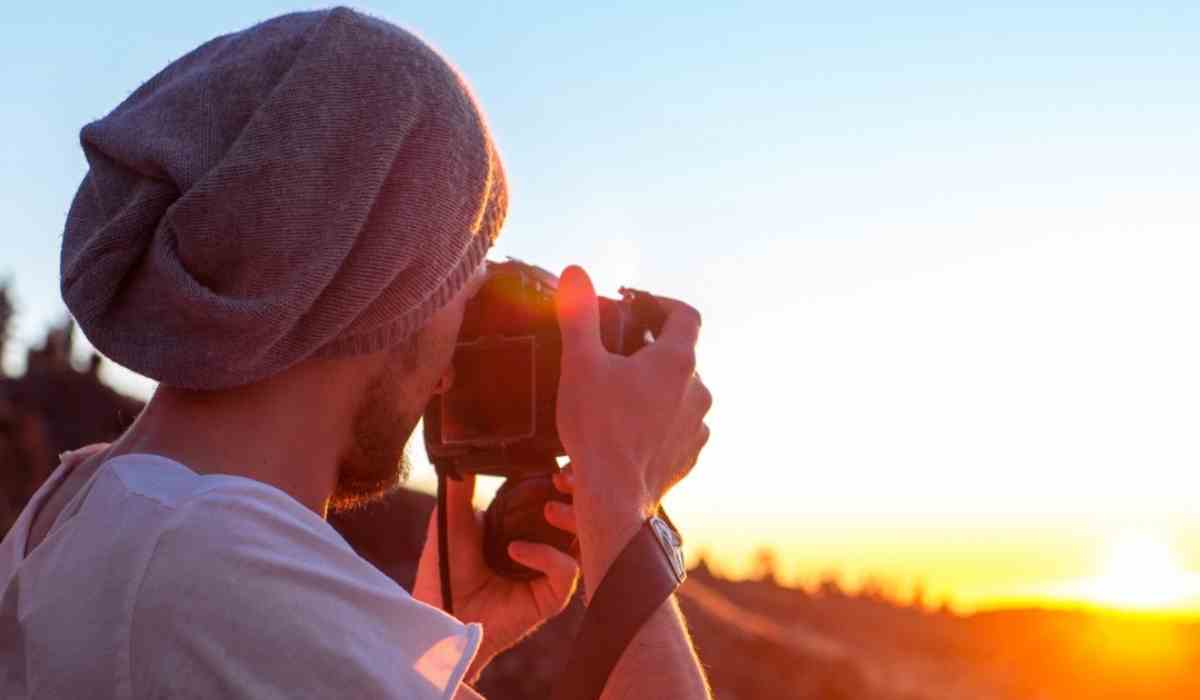
Travel photography is not just about taking pictures; it’s about telling a story, capturing moments, and creating memories that last a lifetime.
Whether you’re visiting a bustling city, exploring a remote village, or hiking through nature, your camera becomes your tool to preserve and share the beauty and culture of the places you visit.
In this post, we will dive deep into the art of travel photography, exploring essential tips, gear, techniques, and how you can make the most of your journey to create stunning photographs.
What is Travel Photography?

Travel photography is the art of capturing images of the places you visit, the people you meet, and the culture you experience during your travels. Unlike traditional photography, which may focus on portraits, landscapes, or specific subjects, travel photography seeks to document the essence of a place. It’s about conveying emotions, stories, and the uniqueness of the destination through your lens.
Travel photography includes various genres such as landscape photography, street photography, architectural shots, wildlife, and even portraiture. It’s not just about capturing “pretty” pictures; it’s about capturing the essence of the moment, whether it’s the hustle of a crowded marketplace, the tranquility of a sunset over the ocean, or the expression of a local in their everyday life.
Essential Gear for Travel Photography:
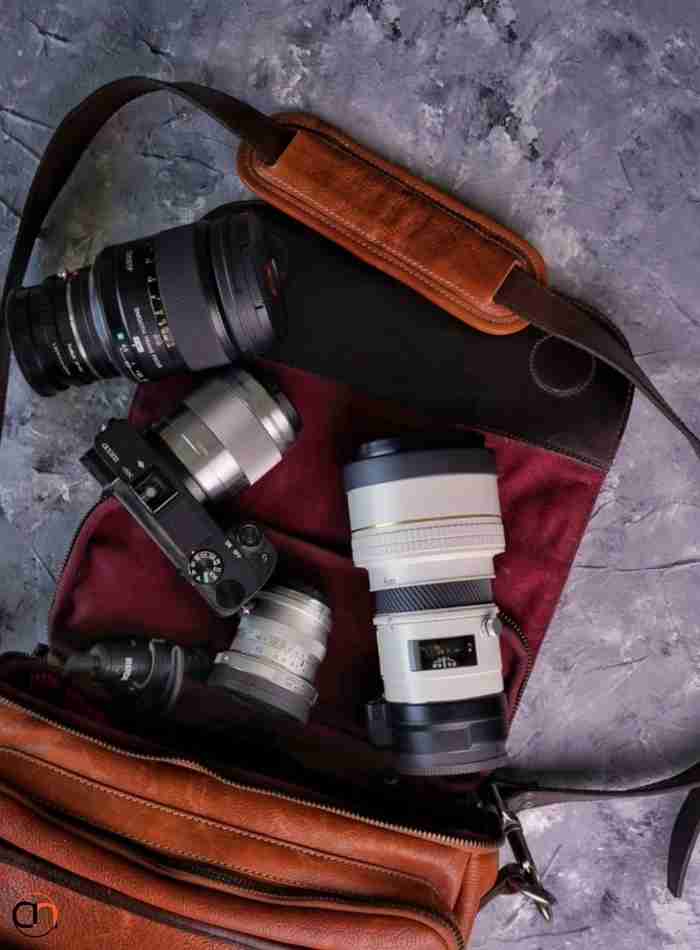
Choosing the right gear is crucial when embarking on a travel photography journey. You want to make sure you have the tools that will allow you to capture high-quality images without weighing you down. Below are some essential items every travel photographer should consider.
1. Camera
The first step is choosing the right camera. While smartphones can take great pictures, a dedicated camera will provide better quality and more control over your shots. DSLR and mirrorless cameras are popular choices for travel photographers because they offer excellent image quality, interchangeable lenses, and manual settings.
-
DSLR Cameras: These are great for beginners and professionals alike. They offer a wide variety of lenses and settings to suit various shooting styles.
-
Mirrorless Cameras: These cameras are lighter and more compact compared to DSLRs but still offer excellent image quality and interchangeable lenses. Mirrorless cameras are ideal for photographers who want a portable camera without sacrificing performance.
-
Point-and-Shoot Cameras: If you prefer a more compact option, point-and-shoot cameras are easy to use and can still deliver sharp, clear images.
2. Lenses
Lenses are arguably the most important part of your travel gear. The lens you choose will affect the composition, perspective, and feel of your photos. Here are a few key lenses to consider for travel photography:
-
Wide-Angle Lens: Perfect for capturing landscapes, architecture, and cityscapes. A wide-angle lens allows you to fit more into the frame, which is especially helpful when photographing vast landscapes or crowded city streets.
-
Zoom Lens: A zoom lens is versatile and can be used for a variety of scenes, from portraits to wildlife shots. It allows you to zoom in and out without changing lenses.
-
Prime Lens: If you want sharper images and better low-light performance, a prime lens (fixed focal length) is ideal. It’s also perfect for portraits, as it creates a beautiful bokeh (blurred background).
3. Accessories
When traveling, it’s easy to forget the smaller accessories that can make a big difference in the quality of your shots:
-
Tripod: For low-light situations or long exposure shots, a tripod is essential. It helps prevent camera shake and ensures sharp, steady images.
-
Extra Batteries and Memory Cards: You don’t want to run out of battery or storage space when you’re in the middle of a great shoot. Always carry extra batteries and memory cards.
-
Portable Hard Drive or Cloud Backup: Make sure to back up your photos regularly. A portable hard drive or cloud storage service is a great way to protect your images while traveling.
-
Lens Cleaning Kit: Dust and smudges can ruin your shots. Keep a lens cleaning kit handy to ensure your lens is always spotless.
Tips for Taking Stunning Travel Photos:
Travel photography is about more than just snapping photos; it’s about using your camera to capture the essence of a place and evoke emotions. Here are some tips that will help you improve your travel photography:
1. Understand Composition
Composition is key to creating impactful photos. There are several composition techniques that can help guide your shots:
-
Rule of Thirds: Imagine dividing your frame into a 3×3 grid. Place your subject along these lines or at the intersections to create balance and interest.
-
Leading Lines: Use natural lines like roads, rivers, or architecture to lead the viewer’s eye into the image and toward the subject.
-
Framing: Frame your subject by using elements in the environment, such as windows, doors, or trees. This can add depth and focus the viewer’s attention on the subject.
2. Make the Most of Lighting
Lighting can make or break a photo. Different times of day offer different types of lighting that can enhance your shots:
-
Golden Hour: The soft, warm light right after sunrise and just before sunset is perfect for creating a magical atmosphere. It can add a beautiful glow to your photos, especially when shooting landscapes and portraits.
-
Blue Hour: The period just after sunset or just before sunrise, when the sky has a cool, blue tone, can create dramatic and serene photos.
-
Avoid Harsh Midday Light: The midday sun can create harsh shadows and overexposed highlights. If you’re shooting at midday, try to find shaded areas or use a diffuser to soften the light.
3. Capture Candid Moments
While posed portraits have their place, candid moments often tell a more authentic and emotional story. Capture people in their natural environments—whether they’re interacting with locals, enjoying a meal, or simply strolling through a market.
4. Pay Attention to Detail
It’s easy to get caught up in the big picture, but some of the most interesting travel photos focus on small, unique details. Look for textures, patterns, colors, and elements that may go unnoticed by others. A close-up shot of a local’s hands working or a beautiful door can add depth to your travel story.
5. Respect Local Culture
When photographing people and cultural events, always be respectful. It’s important to ask for permission before taking portraits, especially in places where people may not be comfortable being photographed. Also, be mindful of any rules or restrictions related to photography, especially in religious or sacred sites.
Post-Processing Your Travel Photos:
After capturing your photos, the next step is post-processing. Editing your photos can help enhance the colors, adjust the lighting, and bring out details that may not be immediately apparent in the raw image.
1. Basic Editing
Start with the basics: adjusting the exposure, contrast, and white balance. You can also crop or straighten the image to improve composition.
2. Advanced Techniques
-
HDR Photography: High Dynamic Range (HDR) photography involves combining multiple exposures of the same scene to capture a greater range of light. This is particularly useful for landscapes where there are bright skies and dark shadows.
-
Color Grading: Adjust the colors in your image to evoke a specific mood. For example, adding warm tones can make a photo feel cozy and inviting, while cooler tones can give a photo a more serene, calm vibe.
-
Sharpening and Noise Reduction: If you shot in low light, your image might have noise (grain). Use noise reduction tools to smooth it out, and sharpen the image to enhance details.
3. Lightroom and Photoshop
Adobe Lightroom is a popular tool for quick edits, while Photoshop offers more in-depth editing options. Both are powerful tools that allow you to enhance your travel photos professionally.
Sharing Your Travel Photos
Once you’ve taken and edited your photos, it’s time to share them with the world. Social media platforms like Instagram, Facebook, and Pinterest are perfect for sharing your travel photography. Building a photography portfolio or blog is also a great way to showcase your work, connect with other photographers, and tell the stories behind your photos.
Take Away:
Travel photography is a unique way to capture the world and share your experiences with others. With the right gear, techniques, and a keen eye for detail, you can create stunning images that tell powerful stories.
Whether you’re shooting landscapes, street scenes, or portraits, always remember that the best travel photos are those that connect with the viewer emotionally. So pack your camera, explore the world, and start capturing the moments that matter most.
Read More: 50 Summer Bucket
FAQs:
Q. What is the best camera for travel photography?
The best camera for travel photography depends on your needs and budget. For beginners, a mirrorless camera or DSLR with an all-purpose lens (such as a 24-70mm) is a great option. If portability is important, consider a high-quality point-and-shoot camera. Popular choices include the Sony Alpha series, Canon EOS, and the Fujifilm X series.
Q. How do I take better photos while traveling?
To take better photos, focus on understanding composition techniques like the rule of thirds, leading lines, and framing. Pay attention to lighting, and try shooting during the golden or blue hour for softer, more flattering light. Also, practice capturing candid moments to make your photos more authentic and dynamic.
Q. What lens should I use for travel photography?
For travel photography, a versatile lens like a 24-70mm f/2.8 zoom lens is a good choice, as it covers a wide range of focal lengths. A wide-angle lens (16-35mm) is perfect for landscapes and cityscapes, while a prime lens (like a 50mm) is excellent for portraits and low-light situations.
Q. Should I edit my travel photos?
Yes, editing can significantly enhance your travel photos. Adjusting exposure, contrast, and white balance can improve the overall quality. Advanced edits like color grading or HDR (High Dynamic Range) can help bring out details in both bright and dark areas of your photo. Tools like Adobe Lightroom and Photoshop are widely used for photo editing.


